
Articles
How to merge front and back ID card photos into a single PDF on mobile

Anyone who has ever applied for a job, opened a digital bank account, submitted an online rental application, or completed an official government registration has likely encountered the following upload prompt: “Please upload your identity document (ID card or driver's license) as a single PDF file containing both the front and back.”
The difficulty is that most people snap two separate photos with their smartphone camera — one of the front and one of the reverse — in JPG or HEIC format. When attempting to upload both files, standard web forms frequently overwrite the first file or reject the upload altogether due to single-file constraints.
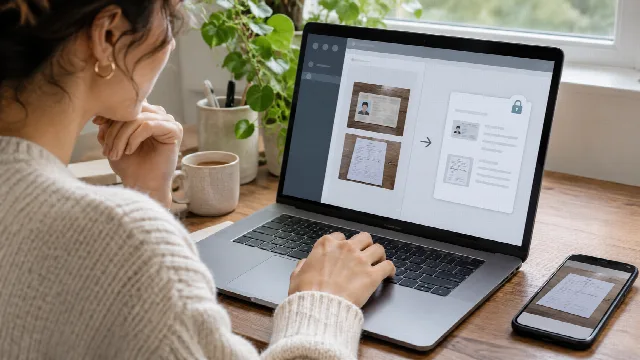
In this practical guide, you will discover how to merge both photos into a crisp, properly aligned PDF document directly on your smartphone, without installing software and without compromising sensitive personal information on third-party servers.
Why modern portals require a single document file
Automated verification systems and administrative review teams require single-file submissions for critical operational reasons:
- Integrity and anti-fraud verification: Keeping the applicant's facial photo, signature, serial numbers, and issuing authority in a unified electronic stream prevents document misplacement and clerical errors.
- Standardized printing and archiving: When legal teams or human resources managers review documentation, a continuous two-page A4 document provides immediate readability without switching between browser tabs.
- Single upload field restrictions: Web forms routinely provide a single attachment button labeled “Identity Verification”. Submitting only the front side leads to automatic application rejection or lengthy verification delays.
How to capture sharp document photos with your phone
The clarity of the final PDF depends on how the original pictures are captured. Before converting, follow these practical camera habits:
- Diffused lighting without glare: Avoid using the camera flash on laminated cards or glossy driver's licenses. The harsh white reflection washes out identification numbers and watermarks. Position yourself near a window with soft daylight.
- High-contrast, plain background: Place your card on a solid dark tabletop or a plain surface. This contrast makes framing intuitive and keeps visual clutter out of the document.
- Parallel overhead angle: Hold your smartphone parallel to the card, directly above it. Angled shots create perspective distortion that makes small print hard to read.
- Clean borders without fingers: Leave a small buffer around the four corners of the card. Never obscure serial numbers or edges by holding the card with your fingers.
Arranging page sequence and orientation
Once both photos are saved in your gallery, proper sequence is essential. Generating a document with the reverse side first can confuse automated optical character recognition (OCR) systems:
- Page 1 (Front): The side featuring the portrait photograph, primary full name, and document expiration date.
- Page 2 (Reverse): The side containing parentage, registration numbers, issuing authority stamps, and barcode data.
With Image to PDF, you can select both images simultaneously. They appear on screen as interactive cards with immediate reordering controls. If the back was loaded first, a single tap moves it to page two.
Choosing the best page format and margins
Selecting the appropriate page format guarantees that the recipient can view and print the document without clipping:
| Page Format Option | Recommended Margin | Typical Application | Key Advantage |
|---|---|---|---|
| A4 Portrait (Standard) | Narrow (5 mm) | Government forms, banking, employment | Universal print compatibility across standard printers |
| A4 Standard Margin | Standard (15 mm) | Legal filings, corporate records | Provides comfortable whitespace for binding and stamps |
| Original Photo Size | Borderless (None) | Direct biometric verification | Preserves exact native camera sensor proportions |
For standard administrative and financial procedures, the optimal setting is A4 (Standard) with Narrow Margin (5 mm) and Auto Orientation. The converter detects whether each photo is horizontal or vertical and centers it cleanly on the page.
Fixing sideways or upside-down smartphone captures
Smartphone orientation sensors often store EXIF tags that legacy web portals fail to interpret, resulting in photos displayed sideways.
To ensure your document is accepted on the first submission:
- Use the dedicated Rotate 90° button on each preview card until the text reads horizontally from left to right.
- Adjust front and reverse cards individually if they were photographed in different rotations.
Why local in-browser processing is vital for personal data
Identity cards and driver's licenses display your most sensitive identity details: government identification numbers, date of birth, residential details, and signature.
When using common online conversion utilities, files are routinely uploaded to remote servers where they may sit indefinitely in temporary caches or face potential data breaches.
The Image to PDF tool on 1kApps employs a strict client-side architecture:
- PDF compilation occurs entirely inside your smartphone's web browser memory using standard Web APIs.
- No image data leaves your device or touches an external server.
- You can load the application, turn on airplane mode (disconnect Wi-Fi and mobile data), and convert your files with complete peace of mind.
Final checklist before submitting your PDF
Take twenty seconds to review the generated PDF before attaching it:
- Text legibility: Zoom in on critical numbers to confirm that small stamps and issue dates are razor-sharp.
- Page sequence: Verify that page 1 shows the front and page 2 shows the reverse.
- File size: A two-page document generated with balanced compression typically weighs between 300 KB and 800 KB, easily fitting within standard 2 MB to 5 MB portal limits.
- Quick preview: Open the downloaded file in your mobile document viewer to verify seamless rendering.